When talking about file sharing between two computers, what comes to your mind? I suppose most of you will answer this question as Wi-Fi. Even though Wi-Fi has improved to a great extent over time and is a good option to transfer small files, sharing large files is not successful. There is a drive but that is not enough. And the speed becomes slower with your data running via a public channel.
According to my experience, using a LAN cable to share a drive or to transfer data is way more efficient than using Wi-Fi. So, I am ready to share my knowledge with you. For that, I brought you this article on how to share files between two computers using a LAN cable.
Related : How to use Nearby Sharing to transfer files between PCs in Windows 10
How to Share Files between Two Computers using LAN Cable; When you can use a LAN cable
A LAN cable or an Ethernet cable gives you great speed in transferring data. Even the cheapest CAT5e cable supports a speed of up to 1000 Mbps. I’ll give you another example. If you use a USB 2.0, the speed will be 480 Mbps. So, an Ethernet cable is the most suitable option.
How to Share Files between Two Computers using LAN Cable; The advantage of LAN cable over the others
As I have mentioned earlier the main advantage of using an Ethernet cable is the faster transfer speed. They are way faster than ordinary flash drives and Wi-Fi. And you can transfer larger files too. Moreover, we tested these in all main Windows versions (Windows 7,8, and 10).
ReadMore: Site audit tools
Prerequisites
- Two Windows Computers
- A LAN cable, a CAT 5 will be good
- Just some patience!
Steps to share files between two computers using LAN cable
Step 1
Connect Both PCs with LAN Cable
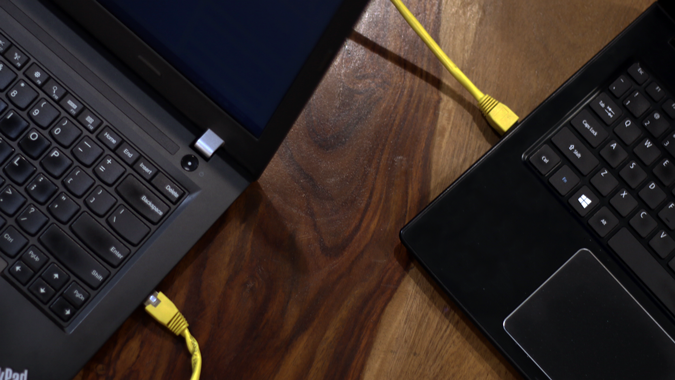
Firstly you need to connect the two computers using the LAN cable. You can use a crossover or an Ethernet cable and that won’t matter on a modern computer. And both of them use the same port and have very few functional differences. Read More: dedicated proxies

Step 2
Enable Network Sharing on both computers
As the second step, you need to turn On Network Sharing on both PCs. Just don’t forget to turn On the option on both computers. Just follow these steps.
- Go to the Start menu and search Control Panel.

- Then click to Open the control panel.
- When te Control Panel opens, just click on Network and Internet.

- Then open Network and Sharing Center in the next dialogue box.
- Or else you can type Control Panel\Network and Internet\Network and Sharing Center in the search box of Control Panel and press the Enter key.

- Now click on Change advanved sharing settings on the left side of Network and Sharing Center.

- There you will see three networks; Public, Private and All Network. Public Network is suitable for places like airports and cafes. And Private network is for a organisation or your home network. So, All Networks consists of both.

- I recommend you to choose All Networks.
- As the next step expand All Networks by clicking on the drop down icon. Furthermore you have to enable Public Sharing, to allow the PCs to access files over the LAN cable.
- Then Turn off password protected sharing also. So that you won’t need to provide any credentials to access shared data.

- As this us not a good security practice, you can make this one time option. Re enable password protected sharing once you have completed the file sharing.
- Next click Save Changes.
- And repeat the exact same steps with the other computer.
Step 3
Setup Static IP
As the third step, we need to bring both PCs to the same network by setting a static IP address of the same class. And make sure to do this on both computers. Here’s how.
- Open Control Panel.
- Go to Network and Internet.

- Then click onNetwork and Sharing Center. Or else you can right click on the Start menu and then select Network Connections.
- In the appearing window, you’ll see the active connections. That will be shown as Ethernet as both computers are connected via a LAN cable. Just click on the Ethernet link. So that a new dialogue box will open
- Click on the Properties button on yhat box.

- Then click Internet Protocol Version 4 (TCP/IPv4) > Properties. This will open another box.

- In that box you have to configure the two PCs with different IP settings.
Computer 1
Select “Use the following IP address” and enter these values.
It’s not mandatory to use the above IP address. You can use either a class A or class B IP address. But if you are in a doubt, it will be better to use the address in the example.

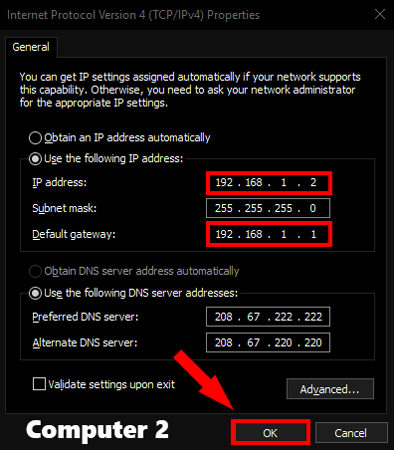
Computer 2
Same steps but flip the IP address and default gateway values to keep the subnet mask the same and changing the IP address.

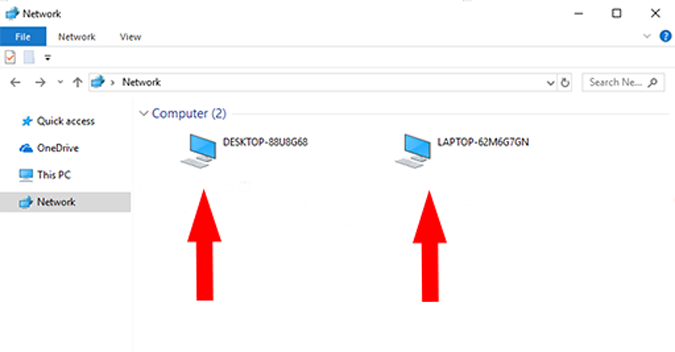
Then open Windows File Explorer and click on the Network tab at the left side of the window. If you followed the steps properly both computers will be visible in this Network window.


Step 4
Share a folder
- To share a file, first share the target folder on LAN. It will be better to create a new folder on the desktop and copy paste all the files that you plan to share in that folder.

- Then choose the folder you want to share and right click on it.
- Navigate to “Give access to” in the context menu and choose the option “Specific People”.

- Now select “Everyone” fromthe drop down menu. And just click on the Add button next to it and next on the Share button.


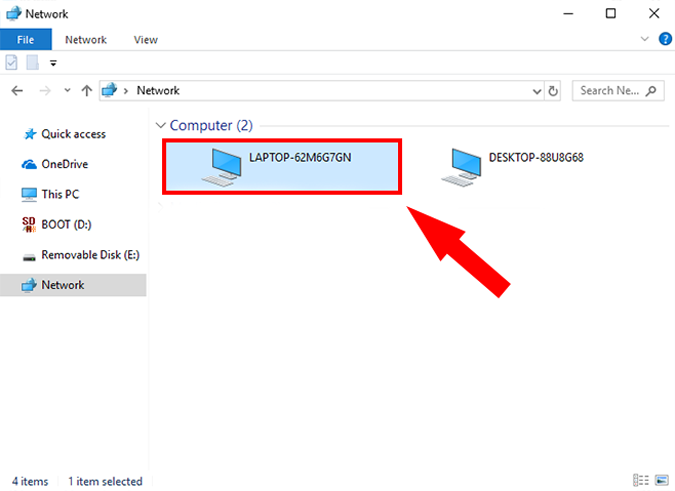
- Now go back to the other computer from where you want to access the file. You need to open the Networks panel and click on the other computer’s name.

- Now you will see the shared folder. Then open the folder and transfer the files as usual. By copying and pasting.

Moreover, you can repeat the exact same steps from the other PC. With this, I conclude the guide on How to Share Files between Two Computers using LAN Cable. But, there is a thing you need to know. This guide is only for Windows computers. For Mac or Linux, you will need a file-sharing agent like Samba.
